How to Replace Brake Pads: A Step‑by‑Step Guide for DIY Mechanics
Why Replacing Brake Pads Matters
Every driver knows that brakes are the most critical safety component on a vehicle. When you replace brake pads at the first sign of wear, you keep stopping distances short and avoid costly damage to rotors or calipers. This guide walks DIY mechanics through the process with the same care a professional shop would use.
Tools and Safety Gear You’ll Need
- Jack and jack stands rated for your vehicle’s weight
- lug wrench or impact driver
- C‑clip pliers or brake pad spreader
- Torque wrench (preferably 20‑30 ft‑lb range)
- Brake cleaner spray
- Gloves and safety glasses
- New brake pads that match OEM specifications (see our shop for quality options)
How to Replace Brake Pads
The core of the process is simple, but attention to detail separates a reliable repair from a repeat‑visit to the shop. Follow these steps:
1. Prepare the Vehicle
- Park on a level surface, engage the parking brake, and block the rear wheels.
- Loosen the lug nuts on the front wheels just enough to turn them by hand.
- Raise the front of the car with a jack, then secure it on jack stands.
- Remove the wheels to expose the brake assembly.
2. Remove the Old Pads
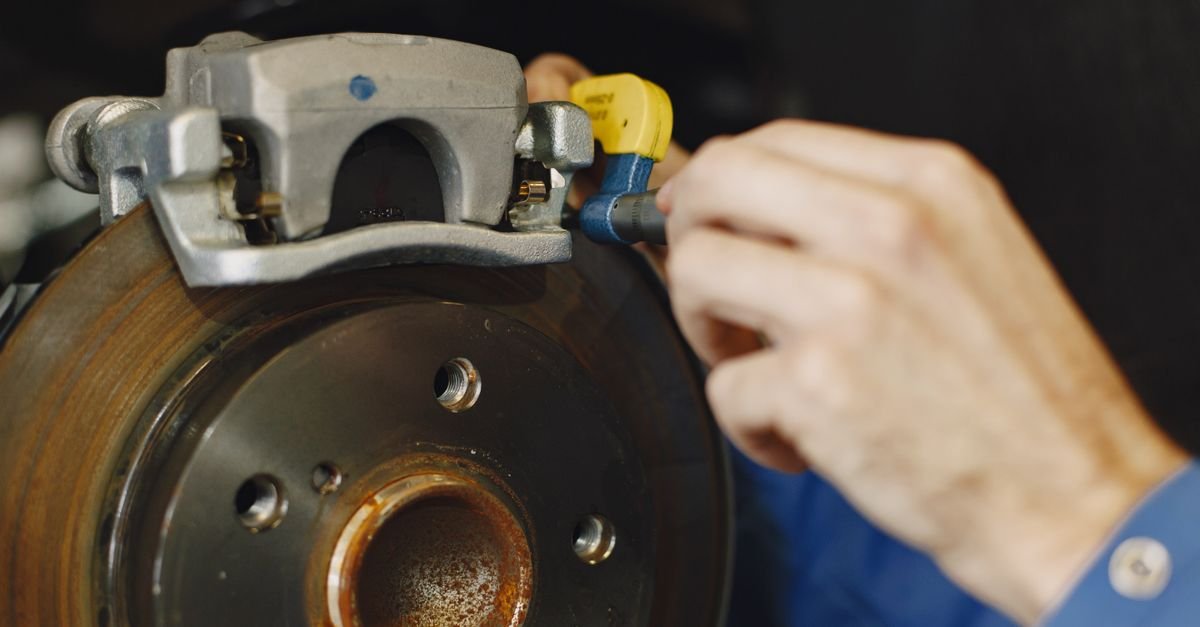
- Locate the caliper bolts (usually two) and remove them with a socket.
- Slide the caliper off the rotor; support it with a bungee cord—do not let it dangle from the brake hose.
- Take out the retaining clips or pins that hold the pads in place.
- Pull the old pads out. If they stick, gently tap with a rubber mallet.
3. Inspect Rotors and Hardware
- Spin the rotor; listen for grinding or feel for wobble. Replace or resurface if thickness is below the minimum spec.
- Check the caliper pistons for leaks; clean any brake dust with brake cleaner.
- Replace worn hardware (shims, anti‑rattle clips) with new OEM‑quality parts.
4. Install New Pads
- Compress the caliper piston using a C‑clip plier or a dedicated piston tool until it fully retracts.
- Place the new pads into the caliper bracket, ensuring the friction material faces the rotor.
- Re‑install the retaining clips or pins.
- Re‑mount the caliper over the pads and torque the bolts to the manufacturer’s specification (usually 20‑30 ft‑lb).
5. Re‑assemble and Test
- Put the wheel back on, hand‑tighten the lug nuts, lower the car, then torque the nuts in a star pattern.
- Press the brake pedal several times to seat the pads against the rotor.
- Perform a short, low‑speed test drive to verify proper brake feel and no abnormal noises.
Maintenance Tips After Replacing Brake Pads
Keeping your braking system in top shape extends the life of both pads and rotors.
- Check brake fluid level monthly; top off with DOT 4 fluid if needed.
- Inspect pads every 10,000 mi or sooner if you hear squealing.
- Rotate rotors during tire changes to promote even wear.
- Avoid riding the brakes on steep descents; use engine braking instead.
Common Mistakes to Avoid When You Replace Brake Pads
- Skipping the piston compression step – leads to uneven pad contact and brake drag.
- Using the wrong pad material for your vehicle’s weight or driving style.
- Over‑tightening caliper bolts, which can warp the mounting bracket.
- Neglecting to clean the caliper bore; residue can cause pistons to stick.
- Failing to bed‑in new pads properly, resulting in reduced stopping power.
Brake Pad Material Comparison
| Material | Pros | Cons | Best For |
|---|---|---|---|
| Organic (Non‑metallic) | Quiet operation, gentle on rotors | Shorter lifespan, higher dust | Daily drivers, light‑weight cars |
| Semi‑Metallic | Good heat tolerance, long life | Noisy, can wear rotors faster | Performance street cars, trucks |
| Ceramic | Low dust, quiet, consistent performance | More expensive, may be too soft for heavy loads | High‑end sedans, performance enthusiasts |
Choosing the right material depends on driving habits and vehicle weight. For most truck owners, a high‑quality semi‑metallic set offers the best balance of durability and stopping power.
FAQs About Replacing Brake Pads
- How often should I replace brake pads? Most OEM recommendations range from 30,000 to 70,000 mi, but listen to the squeal and monitor pad thickness.
- Can I reuse the caliper bolts? Yes, as long as they are not stretched or damaged. Apply thread‑locker if the manufacturer advises.
- Do I need to bleed the brake system? Only if you open the hydraulic line or notice a spongy pedal.
- Is it safe to replace pads on a rear‑driven truck yourself? Absolutely, provided you follow torque specs and safety procedures.
- What does a grinding noise mean? It usually indicates the pads are worn to the metal backing, and the rotor may be damaged.
Final Thoughts and Next Steps
Replacing brake pads yourself saves money and gives you confidence in your vehicle’s safety. By following the steps above, using quality aftermarket pads from a trusted source, and avoiding common pitfalls, you’ll enjoy consistent braking performance for miles to come.
Ready to upgrade? Browse our selection of premium brake pads and related hardware at Driven2Parts. Our parts meet or exceed OEM standards, so you can install with peace of mind.
For deeper technical insight, consult the SAE International guidelines on brake system design.