Truck Suspension Upgrade Guide: Boost Ride Quality
When you decide to tackle a truck suspension upgrade, you’re looking for smoother rides, better handling, and increased payload capacity. Whether you haul equipment, hit off‑road trails, or simply want a more comfortable daily drive, the right suspension components can make a noticeable difference. This guide walks you through the planning, parts selection, installation, and post‑install care, so you can approach the project with confidence.
Why a Truck Suspension Upgrade Matters
Stock suspensions are designed for a broad range of conditions, which often means they’re a compromise. A dedicated truck suspension upgrade targets the specific demands of your vehicle, delivering:
- Improved ride comfort on rough pavement
- Enhanced stability when cornering or braking
- Greater articulation for off‑road use
- Increased towing and payload capability
By addressing these areas, you reduce wear on tires and other components, extending the life of your truck overall.
Key Components for a Truck Suspension Upgrade
Before you start, identify the parts that will give you the biggest benefit. Typical upgrades include:
- Coil‑over shocks – Adjustable damping for fine‑tuning ride quality.
- Straight‑through or multi‑link leaf springs – Provide a stiffer platform for heavy loads.
- Upper control arms – Improve wheel alignment and reduce body roll.
- Track bar or panhard bar – Keeps the axle centered under the chassis.
- Heavy‑duty bushings – Reduce flex and improve steering response.
Choosing components that match your driving style and load requirements is essential for a successful truck suspension upgrade.
Step‑by‑Step Installation Guide
Follow these steps to complete the upgrade safely:
- Gather tools and safety gear: jack stands, torque wrench, socket set, and safety glasses.
- Lift the vehicle: Securely jack up each corner and place the truck on sturdy stands.
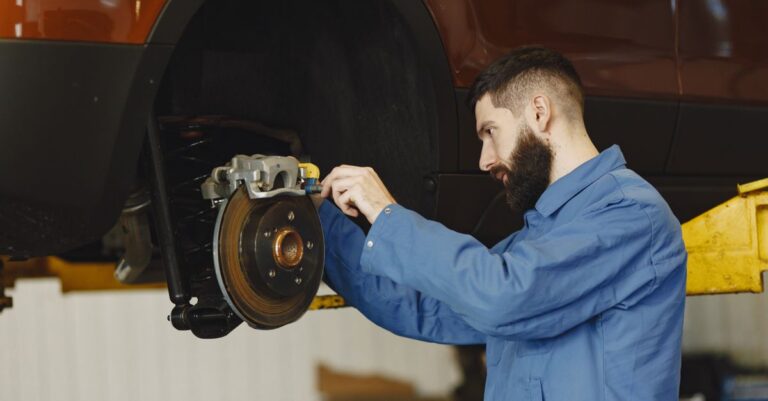
- Remove existing components: Detach the stock shocks, springs, and any related brackets. Keep hardware organized for re‑use if compatible.
- Install new control arms: Align the mounting holes, insert new bolts, and torque to manufacturer specifications.
- Fit the new springs or coil‑overs: Position the spring over the axle, compress if necessary, and secure the mounting plates.
- Attach shocks or coil‑overs: Connect the top mounts to the frame and bottom mounts to the axle, ensuring proper orientation.
- Re‑install any auxiliary components: Track bar, sway bar links, and bushings.
- Lower the truck and torque all fasteners: Double‑check torque values and re‑align the wheels.
- Test drive: Start with a short, low‑speed run to verify handling and listen for abnormal noises.
Take your time with each step; rushing can lead to misalignment or premature wear.
Common Mistakes to Avoid
Even seasoned DIYers can slip up. Keep an eye out for these pitfalls:
- Skipping the torque specifications – under‑tightened bolts can loosen under load.
- Using the wrong spring rate – too stiff will make the ride harsh; too soft defeats the upgrade purpose.
- Neglecting to replace worn bushings – old rubber can cause uneven wear on new components.
- Improper wheel alignment after installation – leads to tire wear and handling issues.
- Overlooking the vehicle’s weight distribution – ensure the rear and front balance is appropriate for your typical load.
Maintenance Tips After Upgrade
Maintaining your new suspension is as important as the installation itself. Follow these guidelines:
- Check bolt torque after the first 100 miles; components settle under load.
- Inspect shock seals and spring mounts quarterly for leaks or cracks.
- Lubricate bushings and pivot points with a high‑temperature grease.
- Rotate tires regularly to promote even wear, especially if you’ve altered camber angles.
- Monitor ride height; sag may indicate worn springs or overstressed components.
Comparison of Popular Suspension Kits
| Kit | Spring Type | Adjustability | Weight Capacity | Price Range |
|---|---|---|---|---|
| Fox 2.0 Performance | Coil‑over | Compression & rebound | 4,000 lb | $1,200‑$1,500 |
| Bilstein 5100 Series | Coil‑over | Pre‑set, optional remote | 3,800 lb | $1,100‑$1,400 |
| Rancho RS9000 | Leaf spring | None (fixed) | 5,500 lb | $950‑$1,200 |
Each kit offers a different balance of adjustability and load rating. Choose the one that aligns with your primary use—whether it’s daily hauling, off‑road adventure, or performance driving.
FAQ
Do I need a professional alignment after a suspension upgrade?
Yes. Even if you’re comfortable with DIY work, a proper alignment ensures tire longevity and correct handling.
Can I mix aftermarket and OEM components?
Mixing is possible, but verify compatibility. Mismatched parts can cause premature wear or safety concerns.
How often should I replace shocks in a lifted truck?
Typical service life is 60,000–80,000 miles, but harsh off‑road use may require earlier replacement.
Will a suspension upgrade affect fuel economy?
Improved aerodynamics and reduced rolling resistance can slightly improve mileage, though heavier components may offset gains.
Is a truck suspension upgrade covered by warranty?
Most aftermarket parts come with a limited warranty. Check the manufacturer’s terms and keep receipts for proof.
Ready to start your truck suspension upgrade? Browse a curated selection of high‑quality kits at Driven2Parts and find the perfect match for your rig. Investing in reputable aftermarket components not only enhances performance but also protects your vehicle’s longevity.
For deeper technical details on suspension design standards, see the SAE guidelines at SAE International.