How to Pick the Best Truck Brake Upgrade for 2026 Performance
When you haul heavy loads or push your truck to the limits, the stopping power of your brakes becomes a safety priority. A well‑chosen truck brake upgrade can restore confidence, improve fade resistance, and extend component life. This guide walks you through the decision‑making process, installation basics, maintenance habits, and common pitfalls, so you can get the most out of your investment.
Why a Truck Brake Upgrade Matters
Original equipment brakes are designed for average driving conditions. When you add weight, tow a trailer, or hit the mountain roads, the factory setup can overheat, fade, or wear prematurely. Upgrading addresses three core needs:
- Increased stopping distance control – larger rotors and multi‑piston calipers provide more friction surface.
- Heat management – vented or drilled rotors dissipate heat faster, reducing fade.
- Durability – performance pads and stainless‑steel hardware survive harsh environments.
These benefits translate into safer daily driving and better performance on the track or off‑road.
Key Factors to Evaluate Before Buying
Not every truck brake upgrade fits every rig. Consider the following variables:
- Vehicle weight and payload – Heavier trucks need larger rotors (12‑14 inches) and higher‑capacity calipers.
- Intended use – Towing, off‑road, or performance driving each demand different pad compounds and rotor designs.
- Brake system type – Disc‑only, drum‑assist, or hybrid setups affect part compatibility.
- Budget versus performance – Premium kits offer better heat resistance but cost more.
- Fitment and clearance – Verify that the new caliper fits within the wheel well and that the wheel size can accommodate larger rotors.
Top Components of a Complete Truck Brake Upgrade
A comprehensive upgrade typically includes:
- Rotors – Vented, slotted, or drilled for heat evacuation.
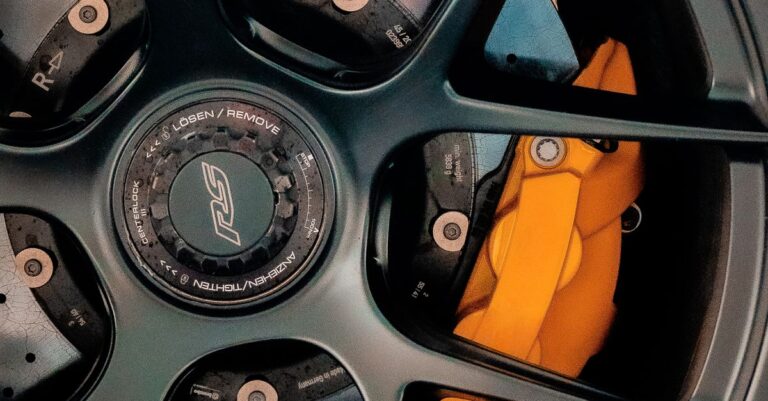
- Calipers – Fixed‑piston, floating, or multi‑piston designs.
- Brake pads – Organic, semi‑metallic, or ceramic compounds.
- Hardware – Stainless‑steel pins, clips, and brake line brackets.
- Brake fluid – High‑temperature DOT 4 or DOT 5.1 fluid.
Installation Checklist and Step‑by‑Step Guide
Even a seasoned DIYer should follow a systematic approach. Below is a concise checklist followed by a brief step‑by‑step overview.
- Gather tools: jack, stands, socket set, torque wrench, C‑clamp, brake fluid pump.
- Inspect existing hardware for wear or corrosion.
- Drain brake fluid into a clean container.
- Remove wheel, then the factory caliper and rotor.
- Install new rotor, ensuring it seats flush with the hub.
- Mount the new caliper, torque bolts to manufacturer specs.
- Attach new pads and hardware, compress pistons with a C‑clamp.
- Reconnect brake lines, refill with fresh fluid, and bleed the system.
- Torque wheel lug nuts, lower vehicle, and perform a test bleed.
Always reference the vehicle’s service manual for torque values and brake line routing. If you encounter unexpected corrosion or damaged brake lines, replace them rather than patching.
Maintenance Tips to Extend the Life of Your Upgrade
Proper upkeep protects your investment and ensures consistent performance.
- Check brake fluid level and condition every 6 months; replace if it appears dark.
- Inspect pads for wear; replace before the friction material drops below 2 mm.
- Clean rotors with a non‑abrasive brake cleaner; avoid oil‑based products.
- Torque caliper mounting bolts after the first 200 mi of break‑in.
- Perform a brake pad bedding procedure: several moderate stops from 30 mph to 5 mph to transfer pad material evenly.
Common Mistakes to Avoid When Upgrading
Even small oversights can cause costly problems.
- Skipping the brake fluid flush – Old fluid can boil under high heat, negating the upgrade’s benefits.
- Using the wrong pad compound – High‑performance ceramic pads may be too soft for heavy towing, leading to rapid wear.
- Improper torque – Over‑tightening caliper bolts can warp the mounting surface; under‑tightening can allow movement.
- Neglecting wheel clearance – Larger rotors may rub against the inner fender or suspension components.
- Reusing old hardware – Stretched pins or rusted clips compromise pad alignment.
Comparison Table: Popular Truck Brake Upgrade Kits (2026)
| Kit | Rotor Size | Caliper Type | Pad Compound | Price (USD) |
|---|---|---|---|---|
| Performance Pro 12″ Vented | 12 in | Four‑piston fixed | Semi‑metallic | $799 |
| Heavy‑Duty 13″ Slotted | 13 in | Six‑piston fixed | Ceramic | $1,149 |
| Off‑Road 14″ Drilled | 14 in | Floating twin‑piston | Organic | $999 |
FAQ About Truck Brake Upgrades
Do I need to replace all four corners?
For balanced braking, it’s best to upgrade front and rear simultaneously. Front brakes do most work, but rear upgrades improve stability under heavy load.
Will a larger rotor affect my ABS?
Modern ABS modules compensate for rotor size changes, but you must recalibrate the wheel speed sensors after installation.
Can I use the same brake fluid as before?
High‑performance upgrades generate more heat, so switching to DOT 4 or DOT 5.1 fluid is recommended.
How often should I bleed the brakes?
Bleed the system after any fluid change, and then at least once a year as preventive maintenance.
Ready to Upgrade Your Truck?
Choosing the right truck brake upgrade starts with understanding your vehicle’s demands and matching them to quality components. When you’re ready, browse our curated selection of rotors, calipers, and performance pads at Driven2Parts. All parts meet OEM specifications and come with a satisfaction guarantee.
For safety standards and technical specifications, see the National Highway Traffic Safety Administration’s brake guidelines at NHTSA.